Soldering Guide
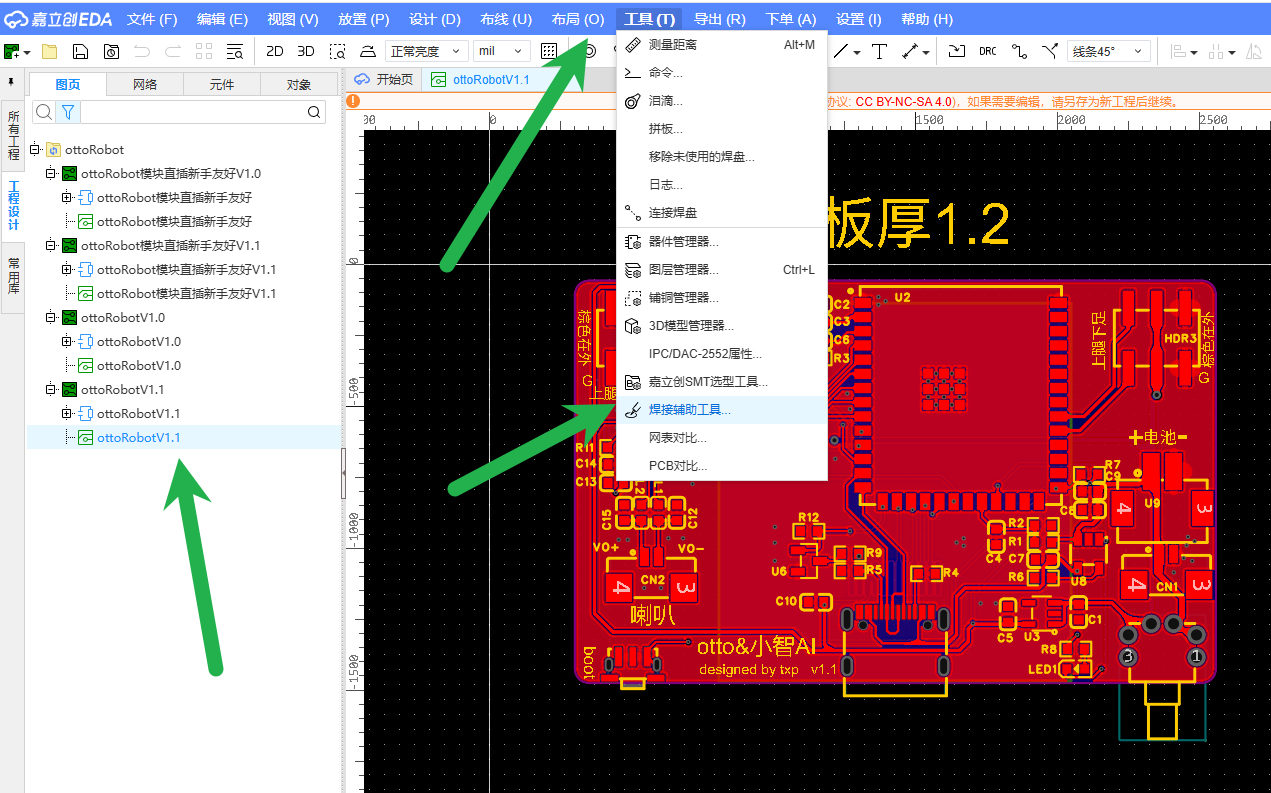
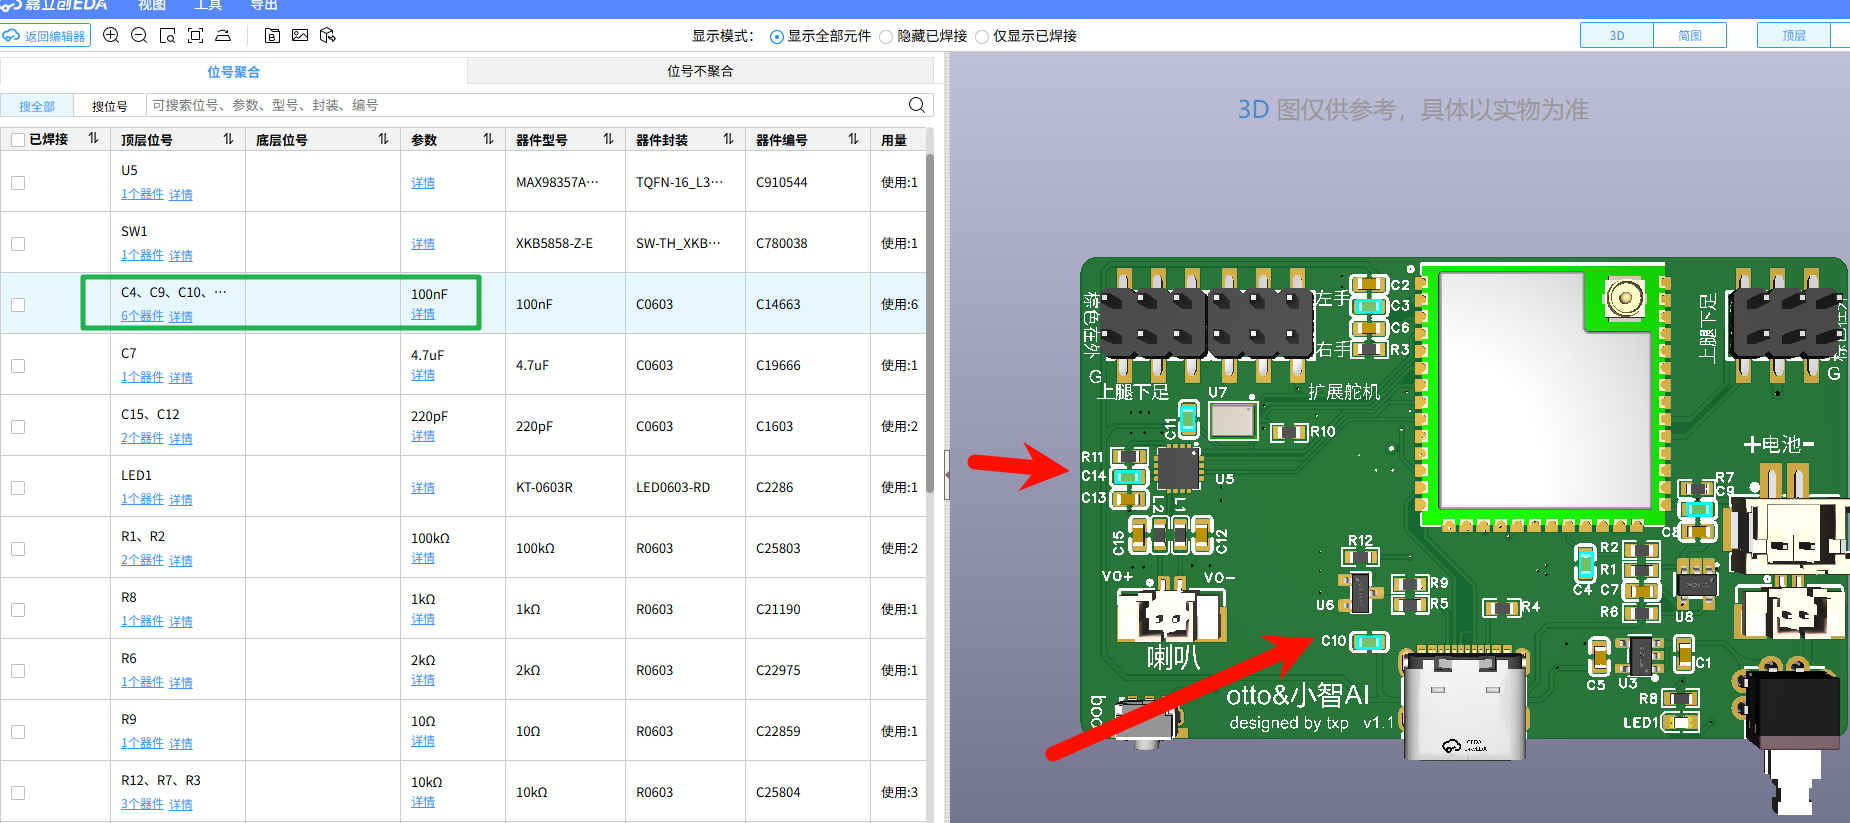
Soldering Auxiliary Tools
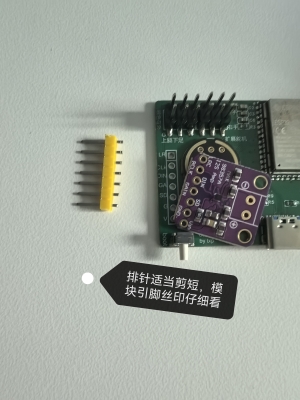
Module Board Key Points

Non-Module Board
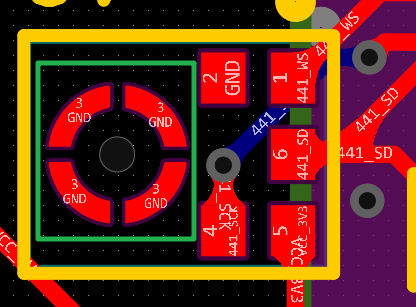
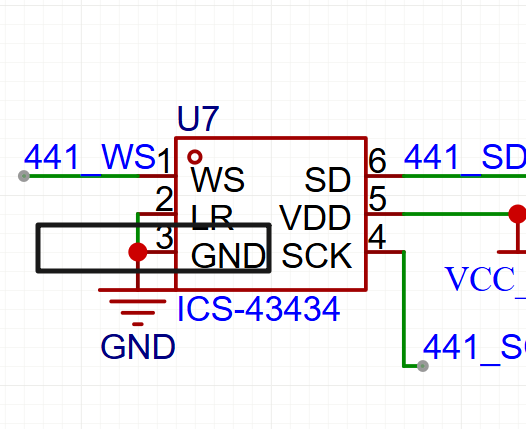
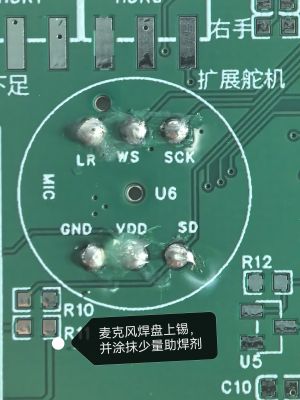
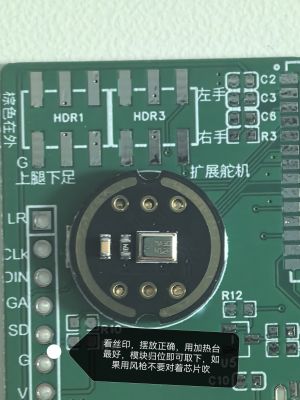
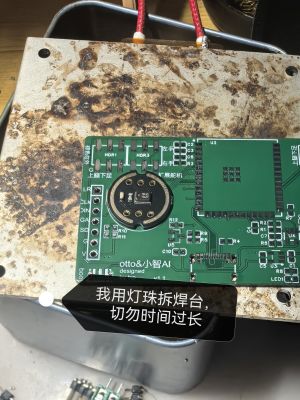
- Microphone: Pin 3 GND ring must be soldered well, otherwise it will heat up unstably and easily burn out. Do not use hot air for a long time, apply solder to the pad first, then quickly place the microphone after melting. Refer to the manual for soldering temperature:
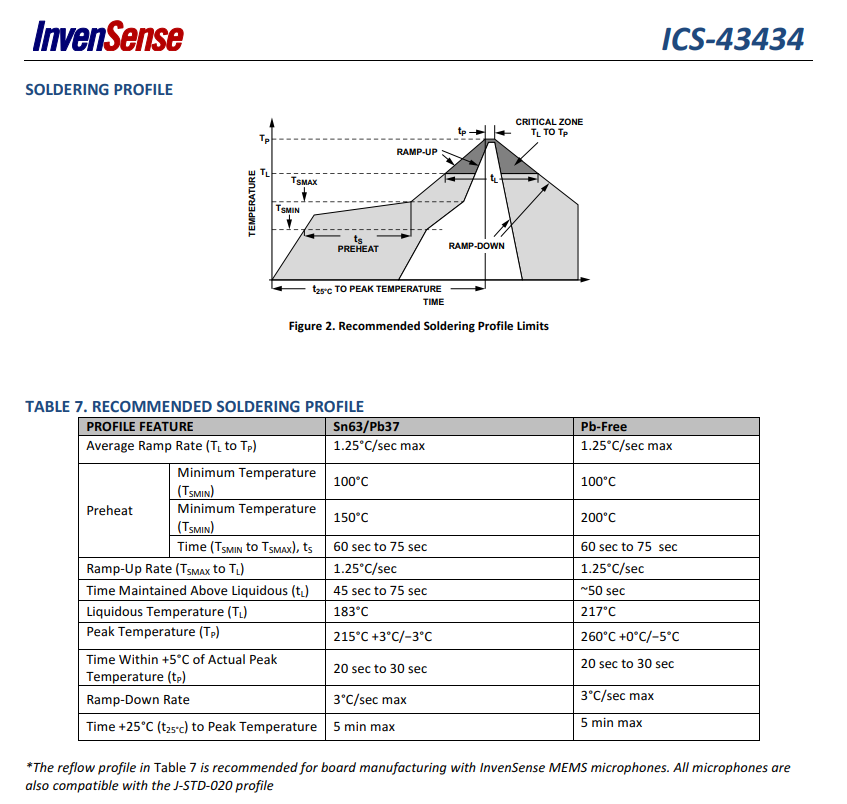 Figure 11
 - Amplifier: Pay attention to direction, + sign corresponds to the white dot in the upper right corner
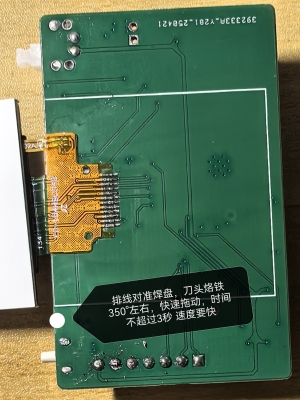
- ESP32: Bottom pads are best soldered, apply solder paste, place on heating platform, or blow with hot air gun
- LED: Left side is negative pole, LED green line faces left, or look at the bottom triangle, the tip points left. This light is the charging indicator, it will slightly light up even without battery
Required Tools
The following basic tools are needed to solder the Otto robot:
- Temperature-Controlled Soldering Iron: Recommended adjustable iron, set to 320-350°C
- Solder Wire: Recommended 0.8mm diameter leaded solder (60/40 or 63/37)
- Flux: Helps with smooth soldering
- Soldering Station: For securing the iron
- Desoldering Braid/Pump: For correcting soldering mistakes
- Tweezers: For placing small components
- Magnifier/Microscope: For inspecting solder joints
- Alcohol: For cleaning PCB
- Hot Air Gun: For removing components (optional)
Post-Soldering Inspection
After completing all soldering, perform the following checks:
- Visual Inspection: Check all solder joints for cold solder or short circuits
- Continuity Test: Use a multimeter to test continuity at key points
- Clean PCB: Clean flux residue on the PCB with alcohol
- Short Circuit Check: Check for shorts between power and ground
- Function Test: Plug in USB cable, check if device is recognized properly
- Voltage Test: Check if voltage at key test points is normal
Advanced Soldering Tips
- Control Soldering Time: Heating time for each joint should not exceed 3-5 seconds
- Keep Iron Tip Clean: Regularly clean the iron tip for good heat conduction
- Correct Soldering Angle: Maintain a 45-degree angle when touching the pad and component pin
- Adequate Heat Transfer: Ensure simultaneous heating of both pad and component pin
- Patience is Key: Don't rush, especially with small components
Common Questions
Q: Why doesn't my solder stick to the pad?
A: The pad may be dirty or oxidized, try using flux and ensure the iron temperature is sufficient.
Q: How to judge the quality of a solder joint?
A: A good solder joint should be smooth and shiny, conical or volcanic in shape, and fully fused with the pad and component pin.
Q: What to do when ESP32 pins are too densely packed?
A: Use a fine-tip iron with flux, or consider using hot air with solder paste.
Q: How to check for short circuits after soldering?
A: Use the multimeter's continuity test function to check if there are unexpected connections between adjacent pins.
Q: What are the most common beginner mistakes?
A: Poor solder amount control (too much or too little), insufficient or excessive heating time, not using flux.
Next Steps After Soldering
After completing soldering, you can proceed with:
- Downloads - Flash firmware to your Otto robot
- Assembly Guide - Assemble the soldered PCB into the 3D printed shell